QuickBooks Payment Gateway Modules
About QuickBooks Payment Gateway Requirement
QuickBooks is payment H
Requirements
1. Store Id
2. Client Number
3. Settlement Account
4. Private key & Public Key
How to download the modules Files
1. Login with your account on our website https://my.aspiredigitalsolutions.com/clientarea.php
2. Go to My Services >> Find QuickBooks Payment Gateway Module >> Click on that service and then click on Downloads tab to download the module files as zip file.
How to upload the module files?
1. Extract the downloaded zip module file
2. Follow the directory structure and find quickbooks.php module file under (whmcsdir/modules/gateways/) folder and then upload on same path "whmcsdir/modules/gateways/)" with your WHMCS server.
3. On this path whmcsdir/modules/gateways/ you can find a callback folder. Upload this folder file on same path "whmcsdir/modules/gateways/callback/)" with your WHMCS server.
How to install the module with WHMCS
1.Once your services is active you will be able to download your module files as a zip folder "download.zip" that you need to unzip or extract it
2. Upload “quickbookPayment” folder and the “quickbookPayment.php” file to the “WHMCS_installation_dir/modules/gateways/”
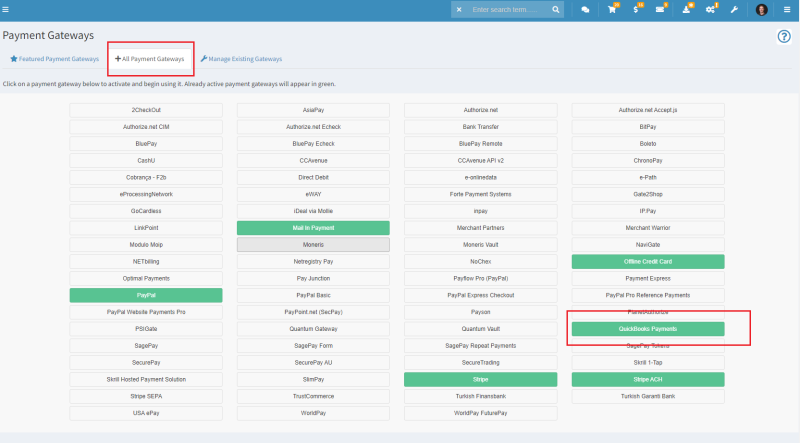
3. Go to the admin area of whmcs and navigate to Setup -> Payment Gateways
4. Find “QuickBooks Payments” from the list and click on it.
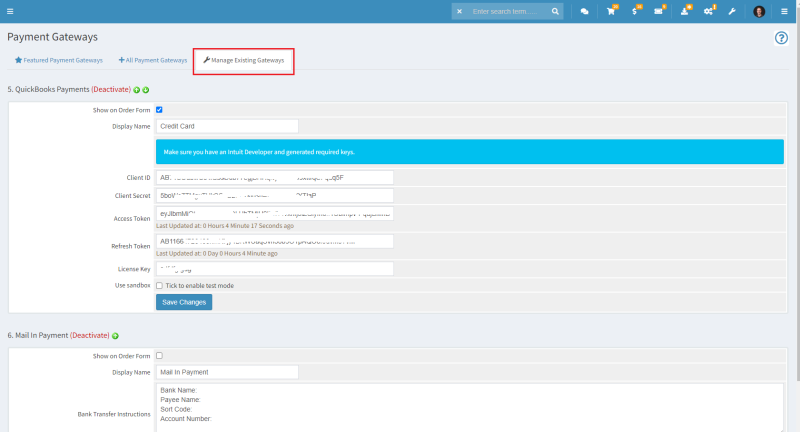
5. Fill the following details as you have obtained earlier "Client ID", "Client Secret", "Refresh Token", "Access Token" and Click on “Save Changes” Button

