Member Directory for MemberPress
About AI-Enabled Member Directory for MemberPress Plugin
This plugin can be used to produce a Member Directory in the frontend specifically for MemberPress.
Requirements
1. MemberPress plugin installed and activated
2. AI-Enabled Member Directory for MemberPress plugin
How to download the plugin
1. Login with your account on our website https://member-directory-for-memberpress.com/pricing/
2. Go to My Services >> Find AI-Enabled Member Directory for MemberPress plugin >> Click on that service and then click on the Downloads tab to download the plugin zip file.
How to install the plugin
There are two ways to install a WordPress plugin:
A. Using the WordPress Dashboard
B. Using FTP
A. Here are the steps for the first method using the WordPress Dashboard:
1. Log in to the WordPress Dashboard.
2. Go to the "Plugins" section in the left-side menu.
3. Click on the "Add New" button at the top of the page.
4. Use the search bar to find the AI-Enabled Member Directory for MemberPress plugin you want to install.
5. Once you've found the plugin, click the "Install Now" button.
6. After the plugin has been installed, click the "Activate" button to turn it on.
B. And here are the steps for the second method, using FTP:
1. Download the plugin files to your computer.
2. Extract the files if they're in a ZIP archive.
3. Connect to your website using an FTP client, such as FileZilla.
4. Navigate to the "wp-content/plugins" directory in your WordPress installation.
5. Upload the extracted plugin files to this directory.
6. Log in to the WordPress Dashboard.
7. Go to the "Plugins" section.
8. Find the AI-Enabled Member Directory for MemberPress plugin in the list and click the "Activate" link.
License key
1. Where to find license key:
After purchasing the plugin, go to your account (log in if not logged in already: https://member-directory-for-memberpress.com/my-account/).
On the dashboard, click "Click here to access license key".
Under the License Key column, find the key to use.
2. Where to apply license key
Once the plugin configuration wizard process is completed the general settings panel will be shown, where the license key will be entered as shown in the below screenshot.
Where to find configuration settings
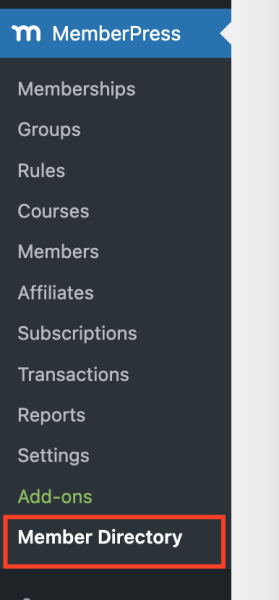
Find the Member Directory sub-menu under the MemberPress menu.
How to configure the wizard
Follow the below steps to configure the plugin wizard.
1. User Role: Select the User Role to show the members directory on frontend.
2. Map: Select Yes/No to show or hide the map.
3. Fields Settings: To show the desired information of an user.
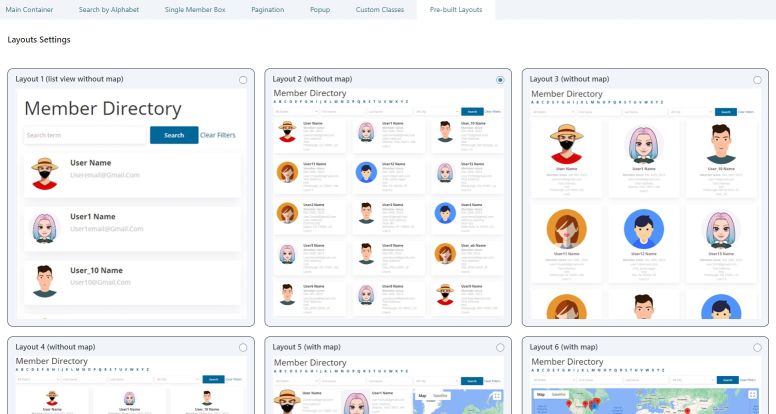
4. Layouts Settings: Choose the prebuilt layout to show the members directory as desired.
5. Shortcode Settings: Click on shortcode to copy and paste on the member directory page to show the users.
6. Finally click on the Finish button to finish the plugin configuration wizard.
Set user role for the Member Directory
Select the user role (under the General Settings tab) from the below setting whose users will be shown in the Member Directory.
How to change Member Directory heading
Replace the text (under the General Settings tab) from the below setting to show in the frontend for the Member Directory.
Manage fields visibility in the frontend
Member Directory field visibility can be managed from the "Fields Label/icon Setting" sub-tab under the "Member Directory Fields Settings" tab.
1. Show/Hide labels and icons along with the field's value
2. Address field setting
Enable/disable address field in the frontend. It will show all the address fields to hide or show. The admin can hide/show addres sub fields too.
3. Show/Hide the member email
4. Profile image settings
Show/hide the member profile image in the frontend. If the show profile image is yes, select the relevant user meta from the all user meta dropdown list where the profile image URL is saved. For MemberPress, it is "mepr_headshot_upload".
5. Member registration date
Show/hide the member registration date in the frontend. If it is set to yes, will show the member registration date else will not show.
6. Google map setting (Google map settings sub-tab)
Show/hide the Google Map in the frontend. If show google Maps is set as yes, select the relevant address fields meta from the user meta dropdown list.
If longitude and latitude are available and selected, the address fields will not be used to plot the member on the map.
A google map key will be required to populate the map in frontend. Please click here to see how to create a google map key.
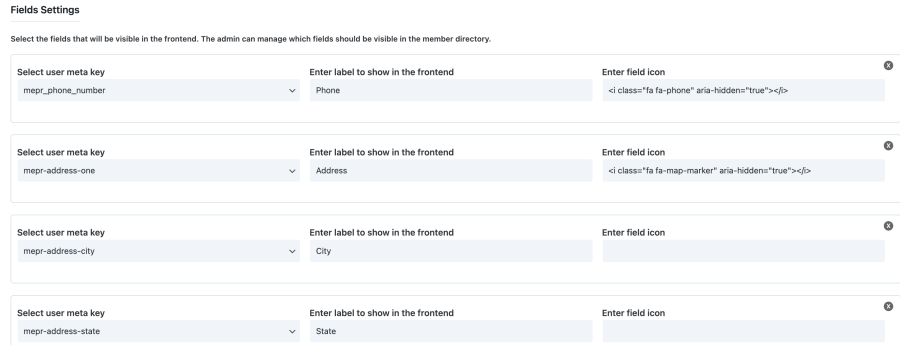
7. User fields setting (Field settings sub-tab)
Fields to show in the frontend. Fields for a member in the frontend can be managed from this section. Select the relevant user meta key, enter the label (if label is enabled from the above settings), and enter the icon's HTML (fontawesome or just an HTML's img tag with icon URL) to show in the frontend.
Selected fields will be rendered here:
8. Add more fields and load MemberPress default fields and custom fields. Import MemberPress User fields will import all the fields that exist in MemberPress and its custom fields. It will automatically select the related user meta key for that field. Just import and save the settings to show all in the frontend.
9. Show Read More Button: Set the desired limit for the number of fields to display before the "Read More" button becomes visible. This value should correspond to the number of meta fields you want to show before users need to click "Read More" to see additional fields.
Manage Member Directory design layout
This section is used to apply the pre-built layout templates, apply custom styling on the selected template, and to add some custom classes.
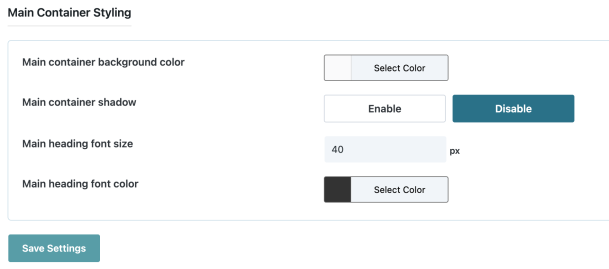
1. Main Container styling
From here, the main container styling can be managed. Background color, main heading font color and font size can be managed.
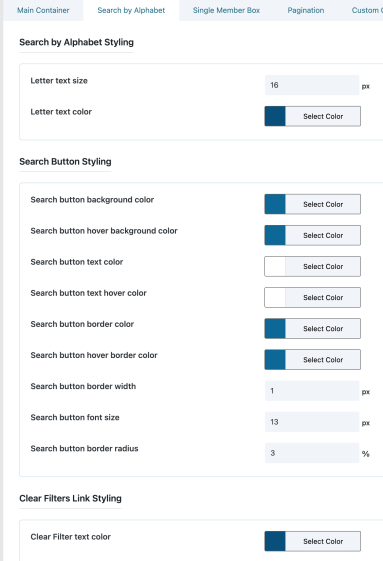
2. Search section styling
Search by alphabet, search button and reset link styling can be managed from here.
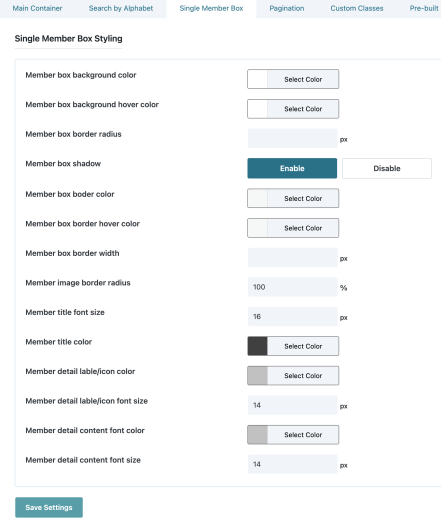
3. Single member box
Single member box font size, backgroud color, font color, box radius and many more styling settings can be managed from here.
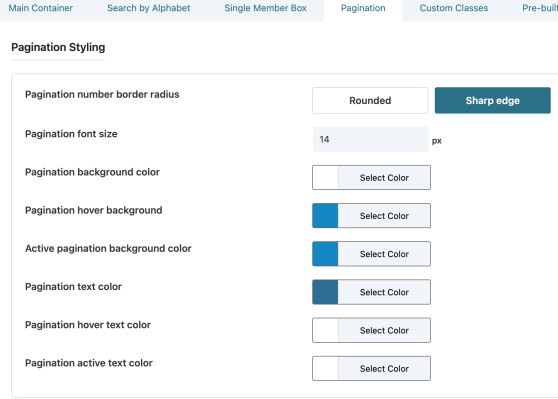
4. Pagination styling
Pagination section can be designed from here.
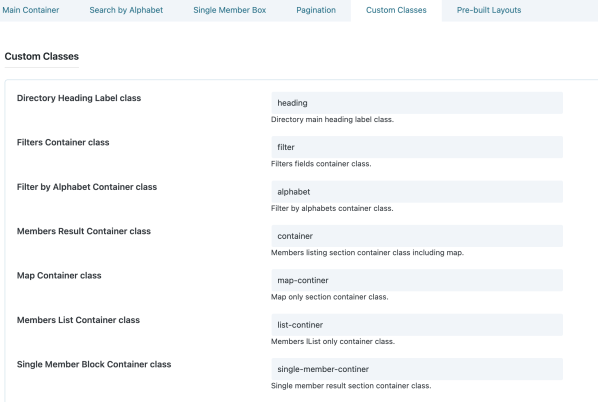
5. Add custom classes
Custom classes can be added to different sections from here to do some other custom styling
6. Applying pre-built layouts
Change pre-built layouts as needed. Applying any section will remove all the custom styling and will change per the selected layout.
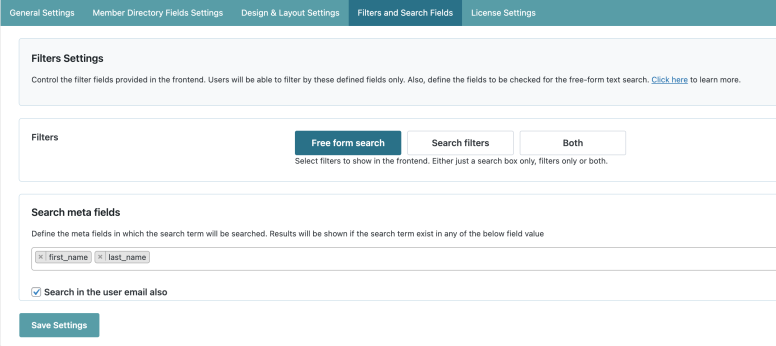
Manage filterable fields and searchable fields
These settings can be used to manage the filterable fields on which public users can search the members. This section also can be used to define which meta field's values should be searched for the search terms entered by the public users to search members.
Only a free form search field can be added from the backend:
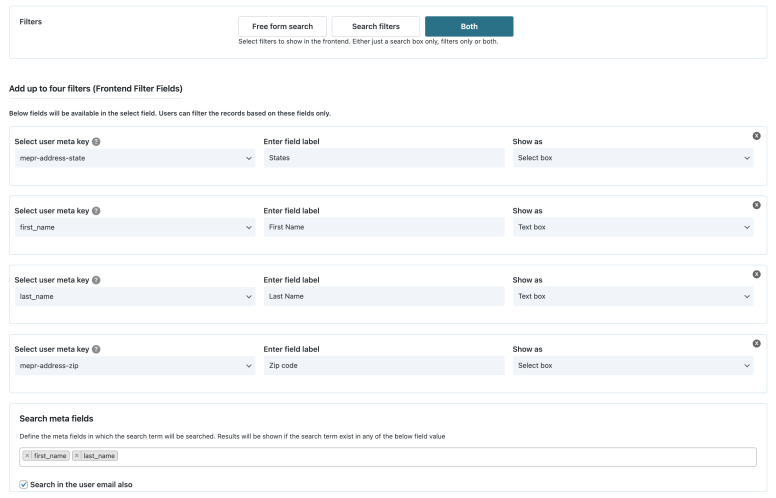
Only Search fields can be added upto four filters:
OR both can be added:
Manage Filterable fields
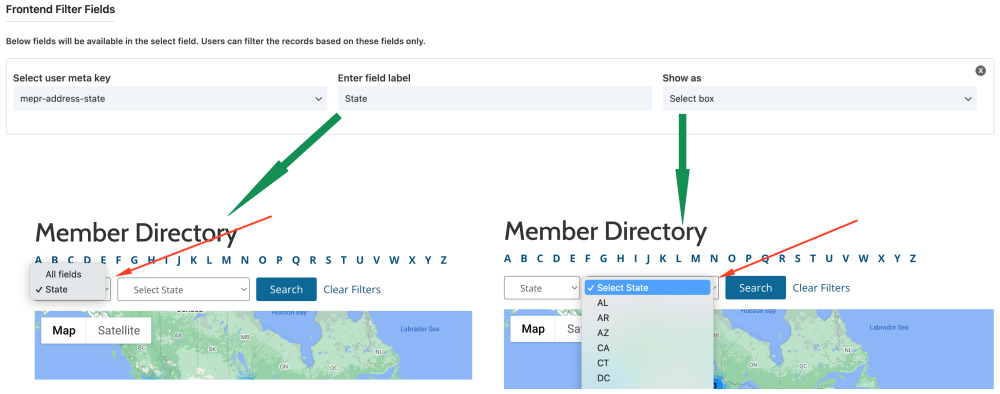
This section shows the filters in the frontend. Any field that is available as a user meta can be used to show as a filter in the frontend. The filter will be shown as either a textbox or a select box. The select box will show the available unique values for that field.
Adding more filterable fields
Click on Add More Filter Fields, select the appropriate user meta key, enter a label, and select if it will be a textbox in the frontend or a dropdown field.
Searchable fields
Whenever a user enters any term to search for any member, all these meta-field values will be searched for that term. Some default fields like email will also be searched, whether they exist here or not. More meta fields can be added, just click on the box, select the appropriate meta, and finally save the settings.
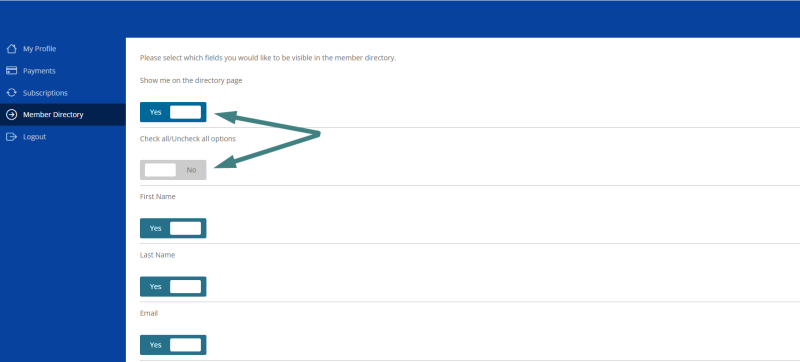
How can users effortlessly toggle the visibility of profile fields?
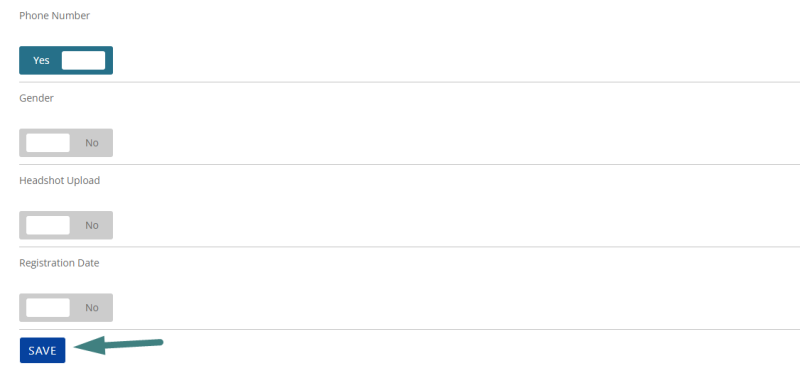
1. Please navigate to the memberpress account page and follow the below steps to toggle the visibility of profile fields.
2. Go to Member Directory Menu.
3. Toggle the button Yes/No to show or hide the fields on member directory page.
4. Please Save the settings after making all the changes.
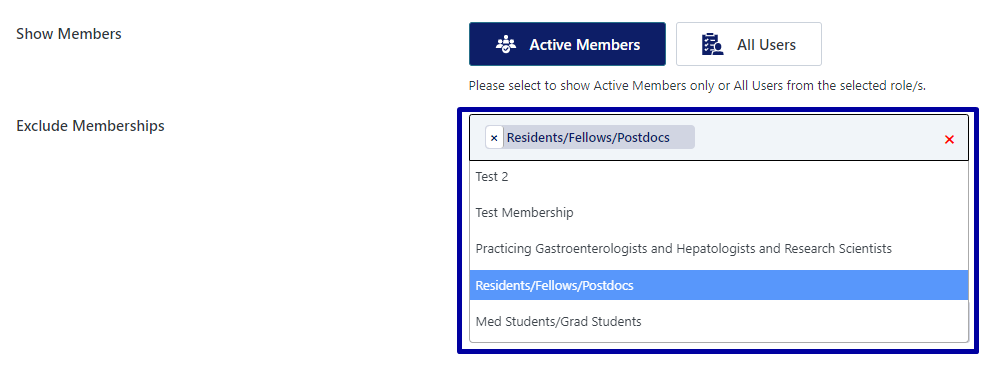
How to exclude the members of a membership from member directory?
1. Go to the General Settings of the plugin and click on the "Active Members" tab to enable the "Exclude Memberships" option.
2. Select the Memberships of members from dropdown which needs to be excluded to display on the member directory page.
3. Click on the Save Settings button to save the changes and check the member directory page to reflect the changes.
Shortcode to use
Copy/paste the [ads_member_directory_sc] shortcode to display the member directory on any page or post.


